
DIY No Sew Dog Harness Upgrade!
If you know me, you know that I LOVE cute dog accessories. I can’t even begin to count the number of bandanas, bow ties, and collars that I have for Henry. It comes with the “fashion designer” turf, I guess!
The one problem? Henry wears an Easy Walk Harness on his walks. It’s absolutely wonderful: it prevents pulling and gently controls him when he spots a dog across the street. His harness is a classic black, but sometimes I wish it had just a little more pizzaz. PetSafe sells Easy Walk Harnesses in these amazing metallics and a few fabulous patterns (LOVE the donuts!), but options are limited and Henry isn’t exactly a sparkly guy.
Just as I had settled on the classic black harness for life, I had an idea: fabric covers! These simple sleeves don’t even require sewing – that’s how easy they are. This tutorial is easily adapted to any collar or harness, and provides a cheap and effortless way to mix up your pup’s look.
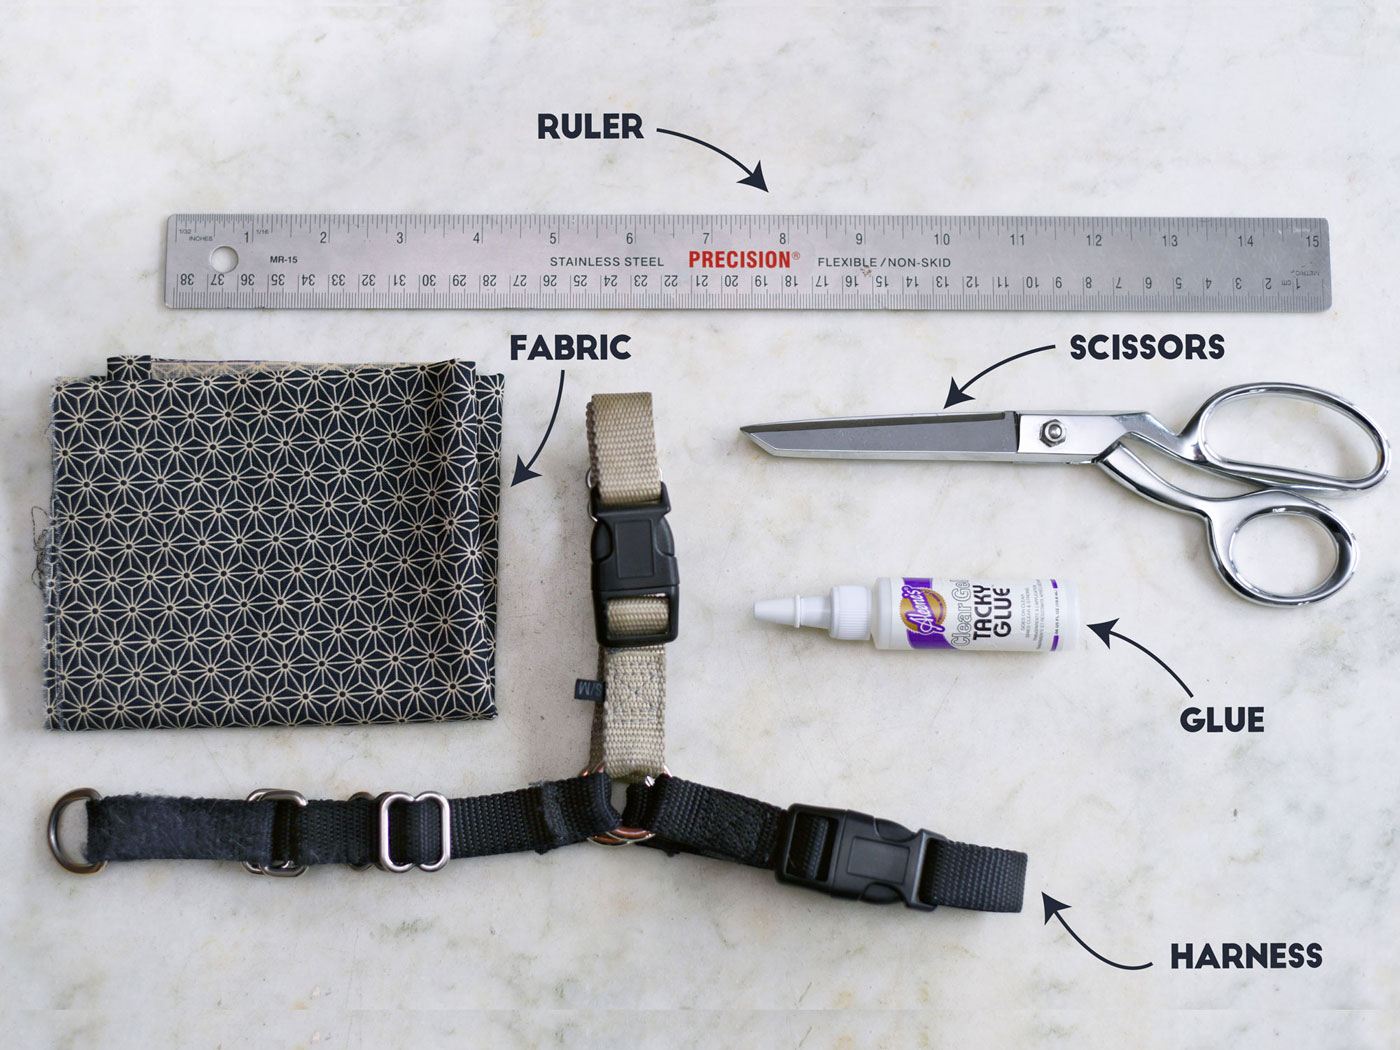
You Will Need:
• One Dog Harness (any size will do)
• Fabric of Choice (Amount needed will will depend on harness size and shape, but a fat quarter should suffice for a small to medium dog)
• Fabric Scissors
• Ruler
• Iron
• Marker or Pen
• Fabric Glue, Craft Clue, or Needle and Thread
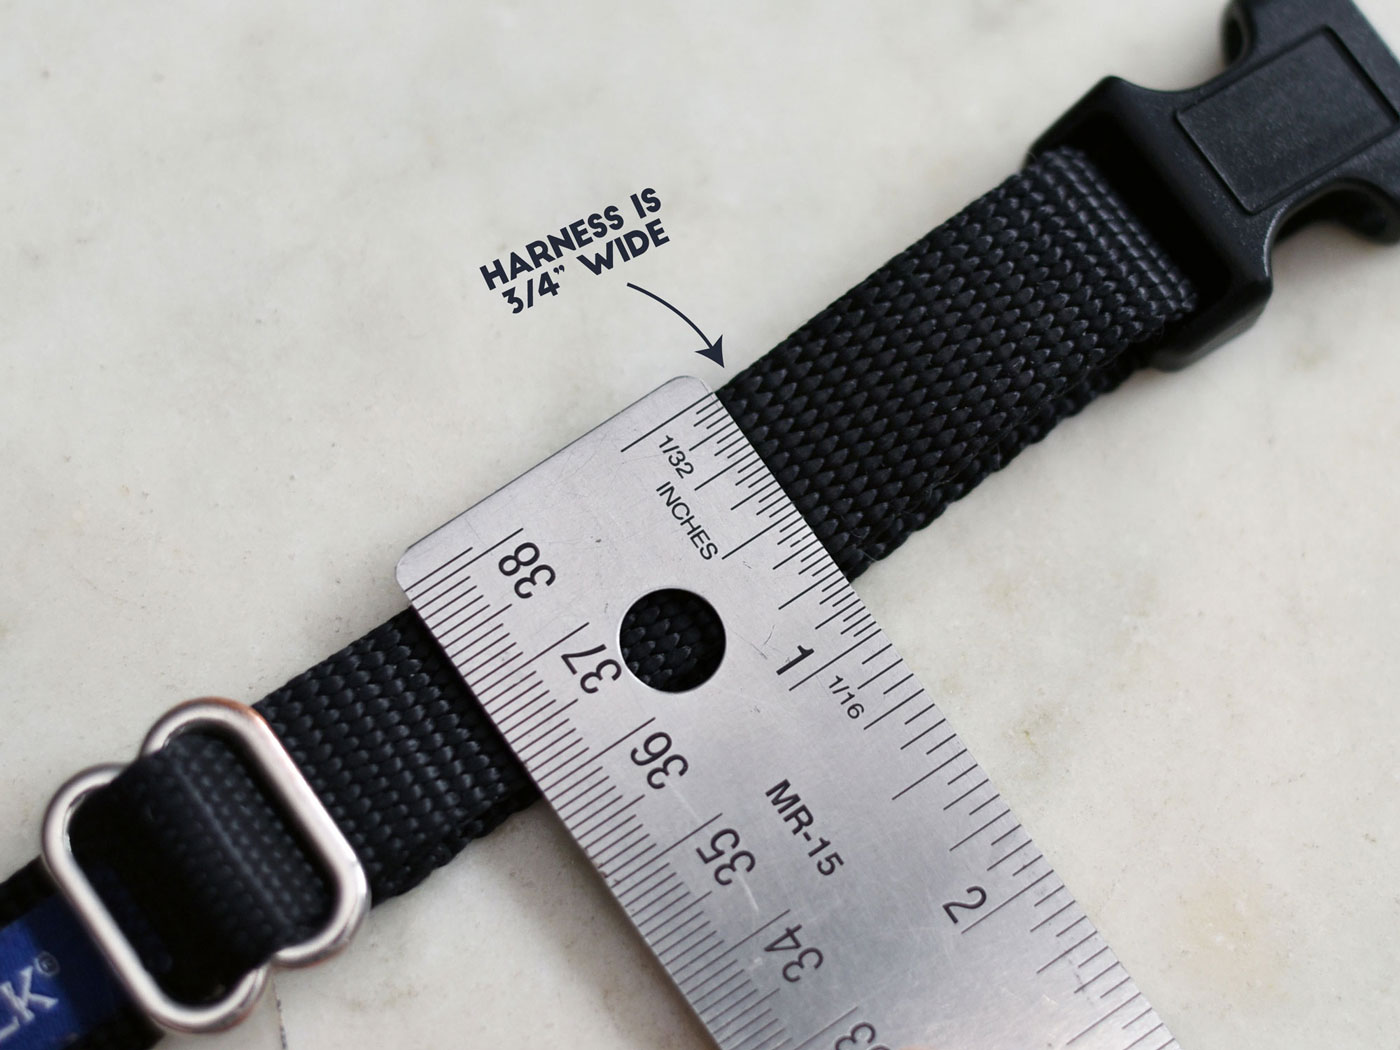
1.) Measure and Cut
The first step is to measure and cut. It’s also the trickiest part! You want to cut one piece of fabric for each harness section using this ratio:
Height = Harness Strap Width X 4
Length = Section Length + 1″
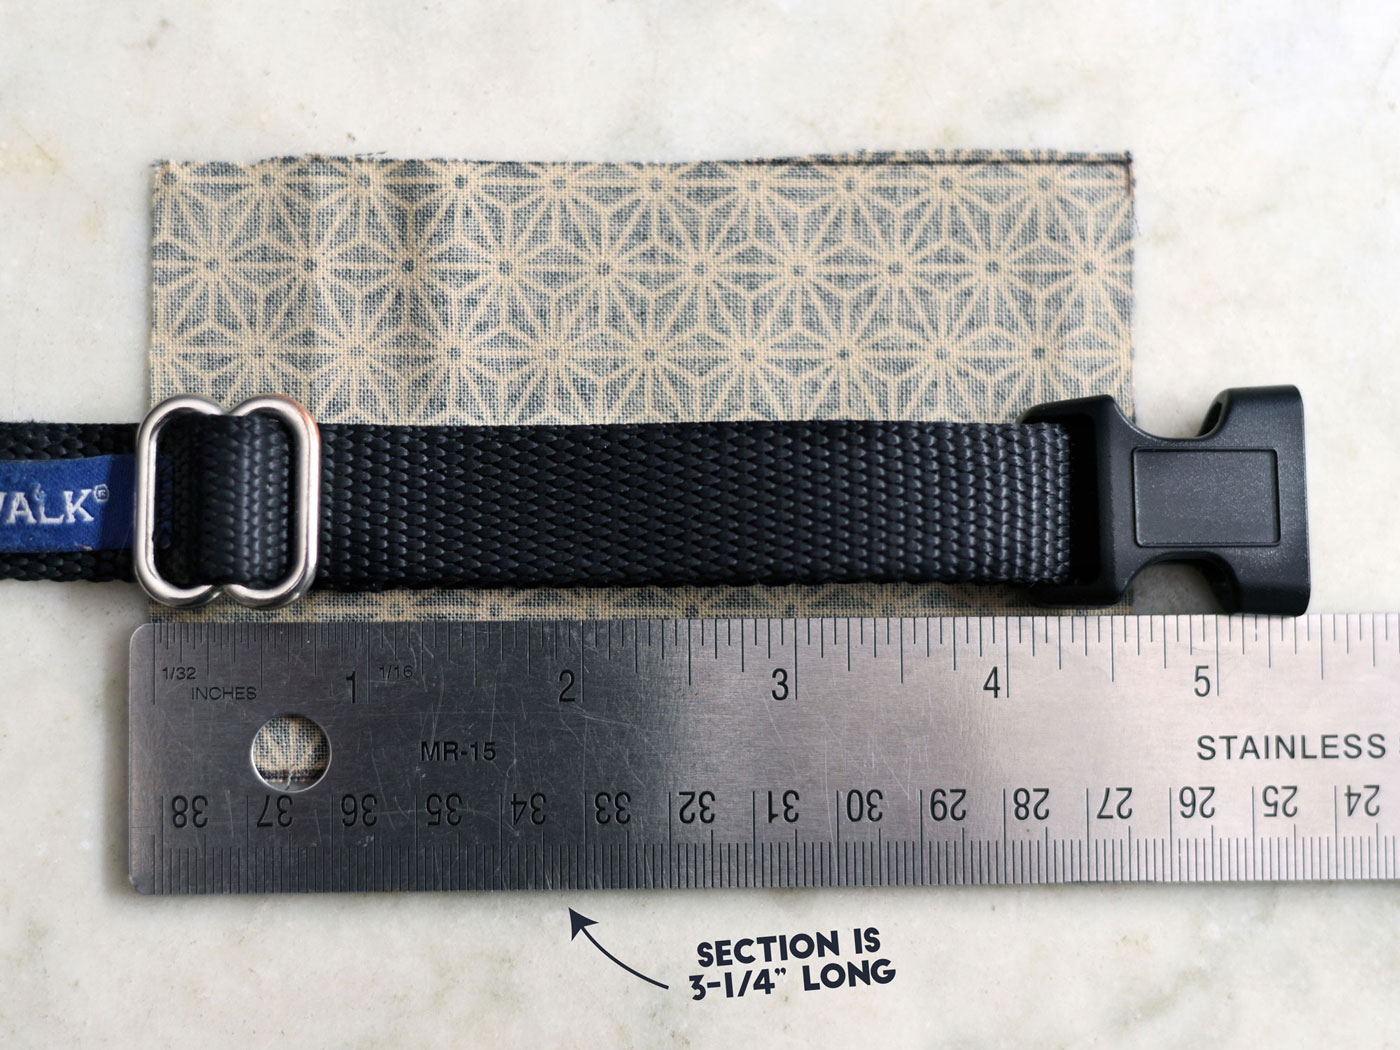
For example, if your harness is 1″ wide and the section you’re cutting for is 6″ long, you want to cut a piece that’s 4″ tall and 7″ long. You may end up trimming each piece a bit, but it’s much better to start with fabric that’s too long than fabric that’s too short.
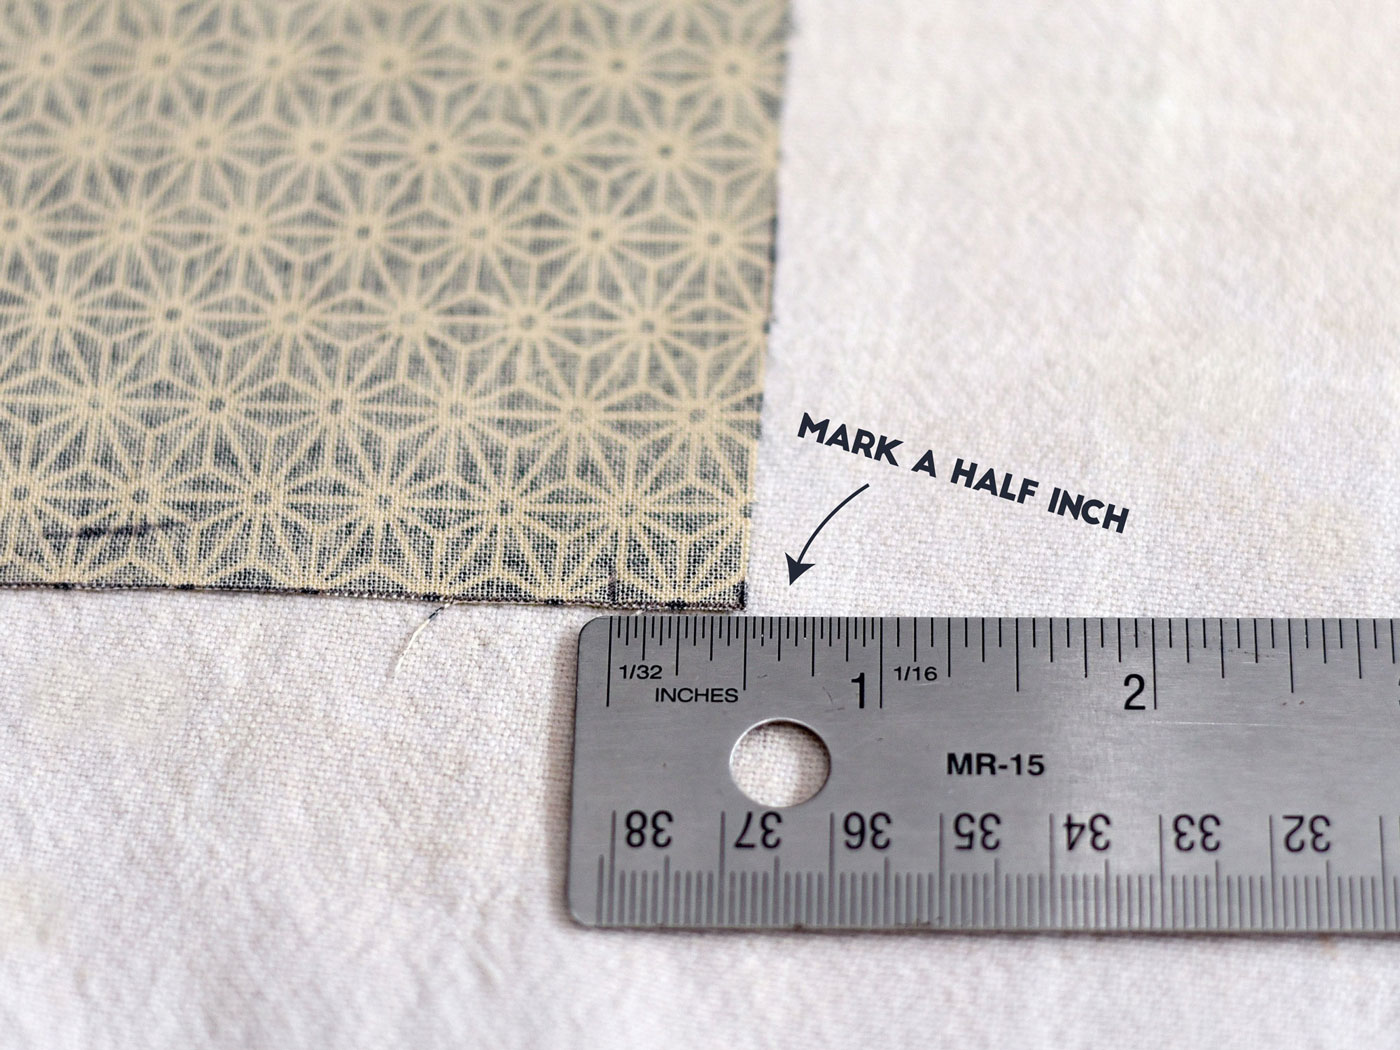
2.) Fold and Iron
Now, fold and iron just the ends of each piece so that they fold 1/2″ under. You may want to measure first with a ruler and mark where you are planning to fold (it certainly made things easier for me!)
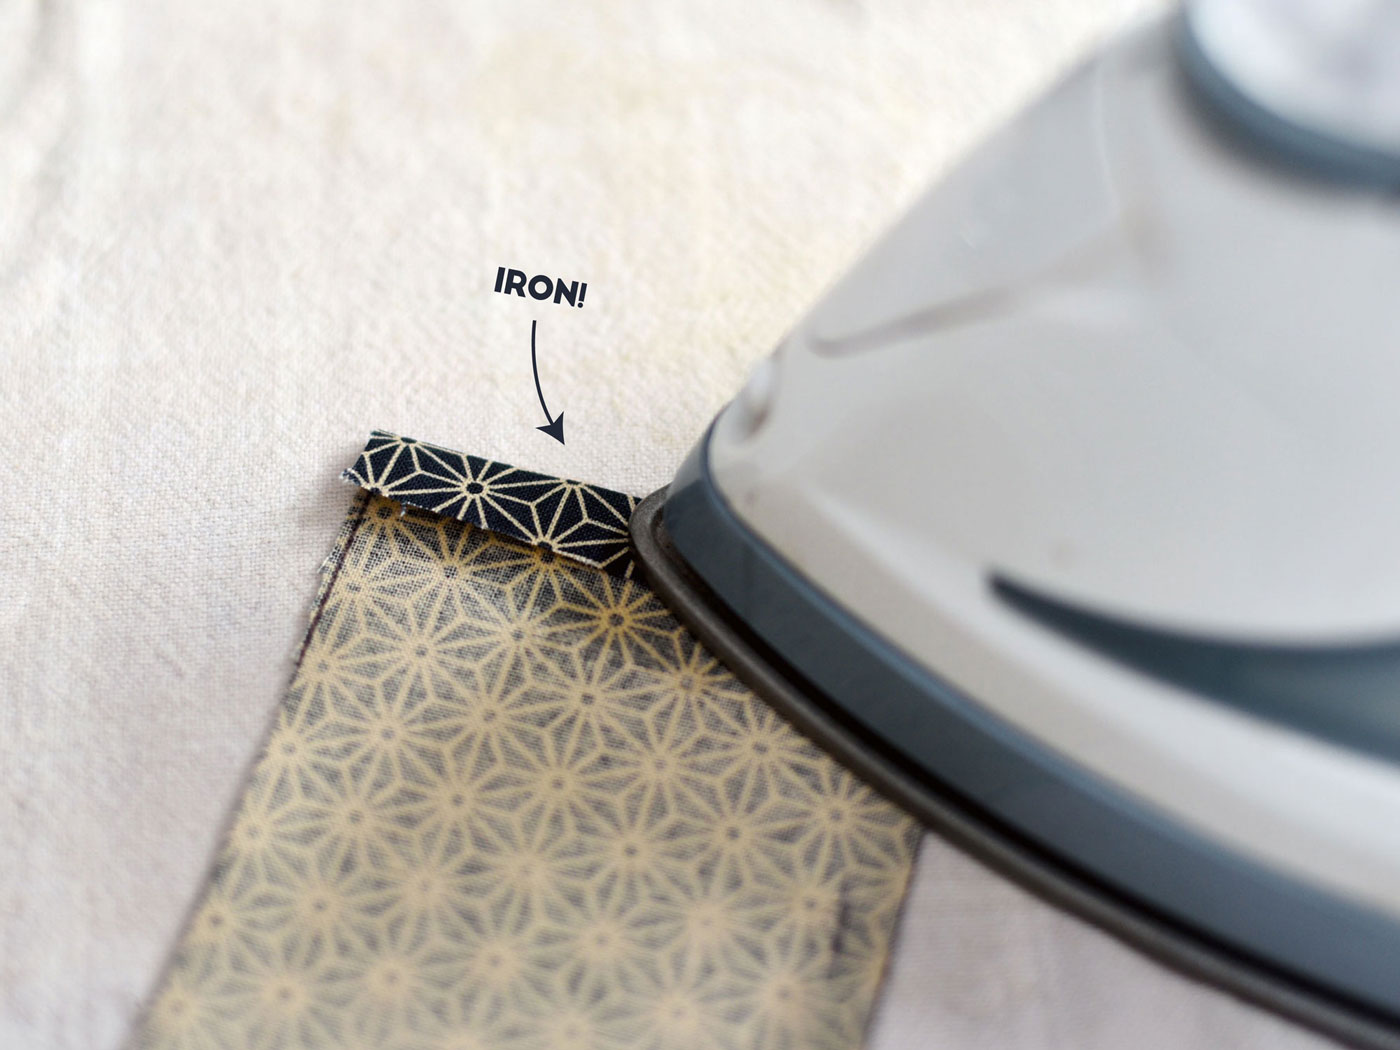
3.) MORE Ironing
The next step is to iron the side that will be folded over at the “seam.” Fold and iron just one long side of each piece about 1/4″.
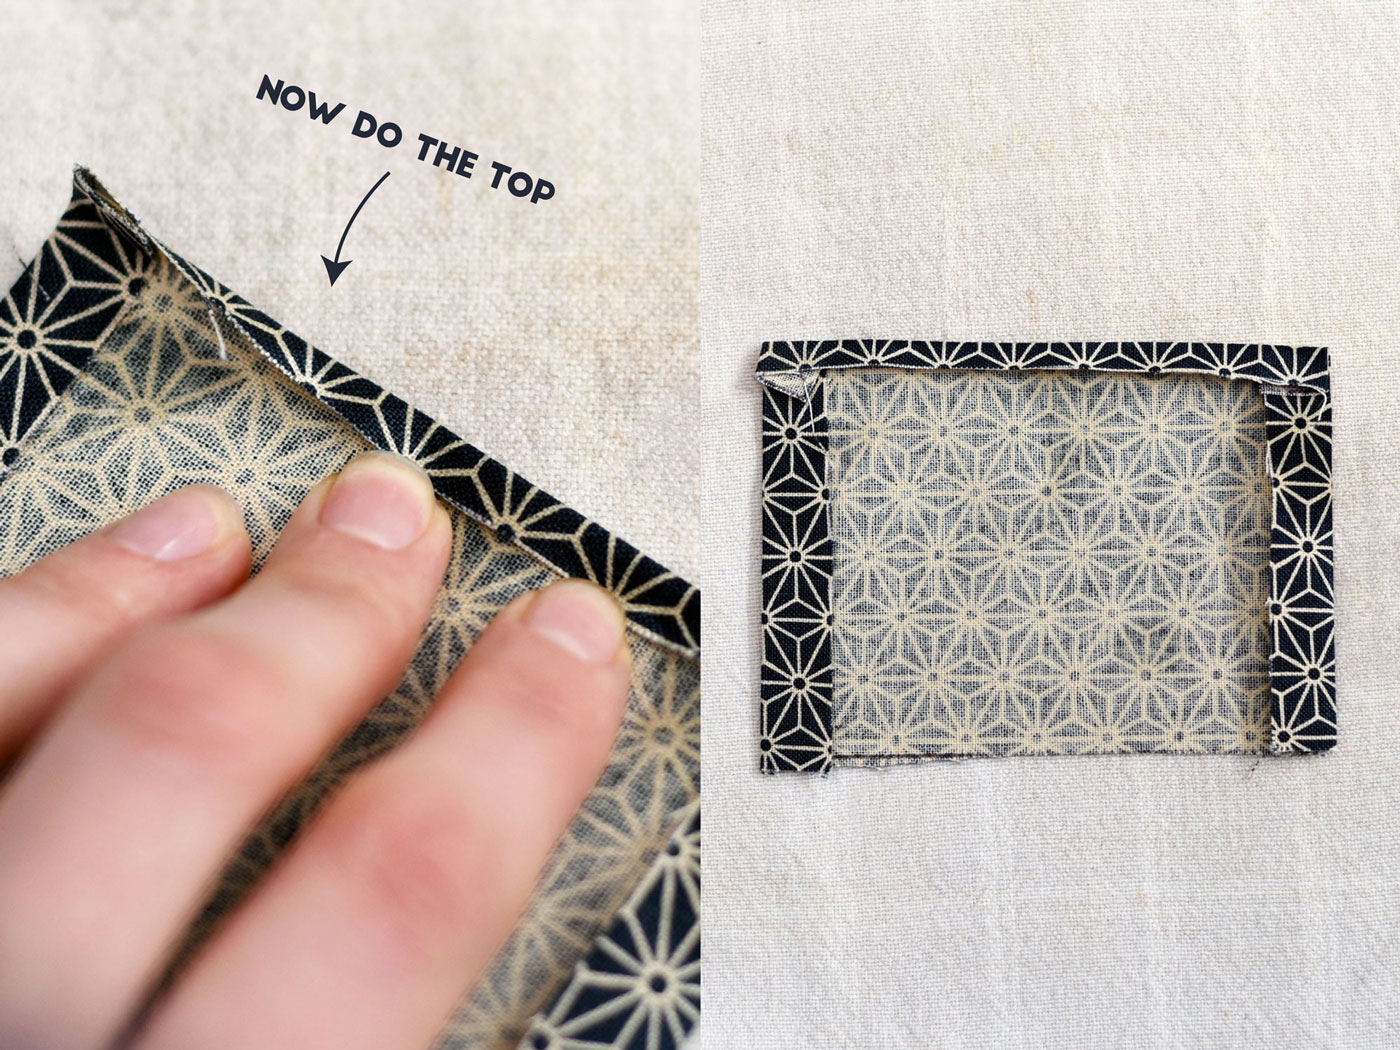
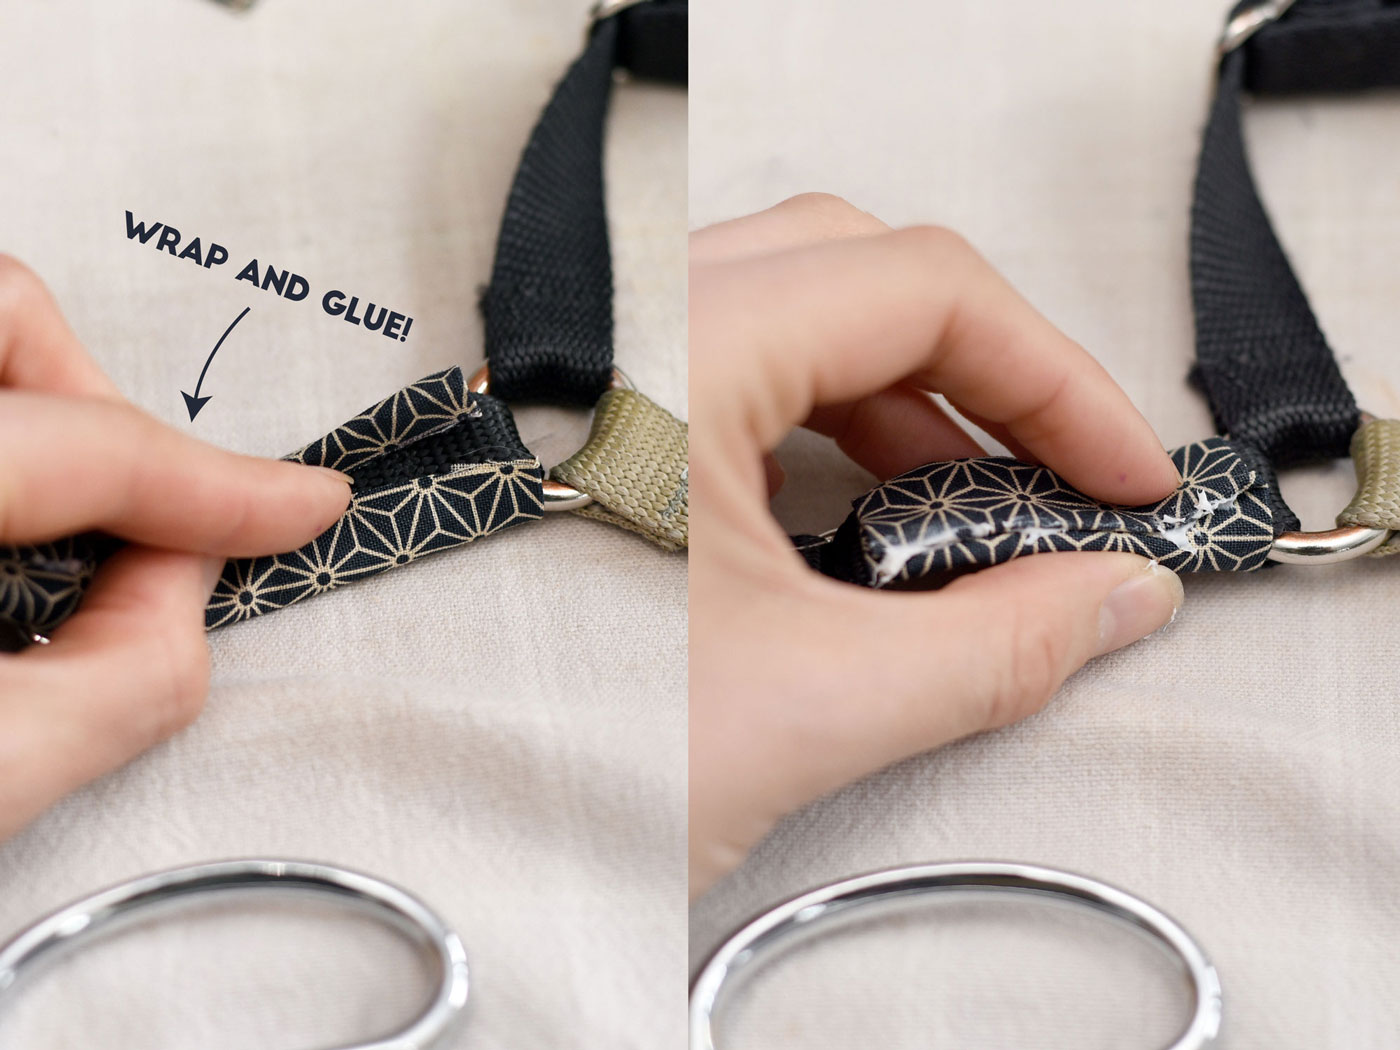
4.) The Fun Part!
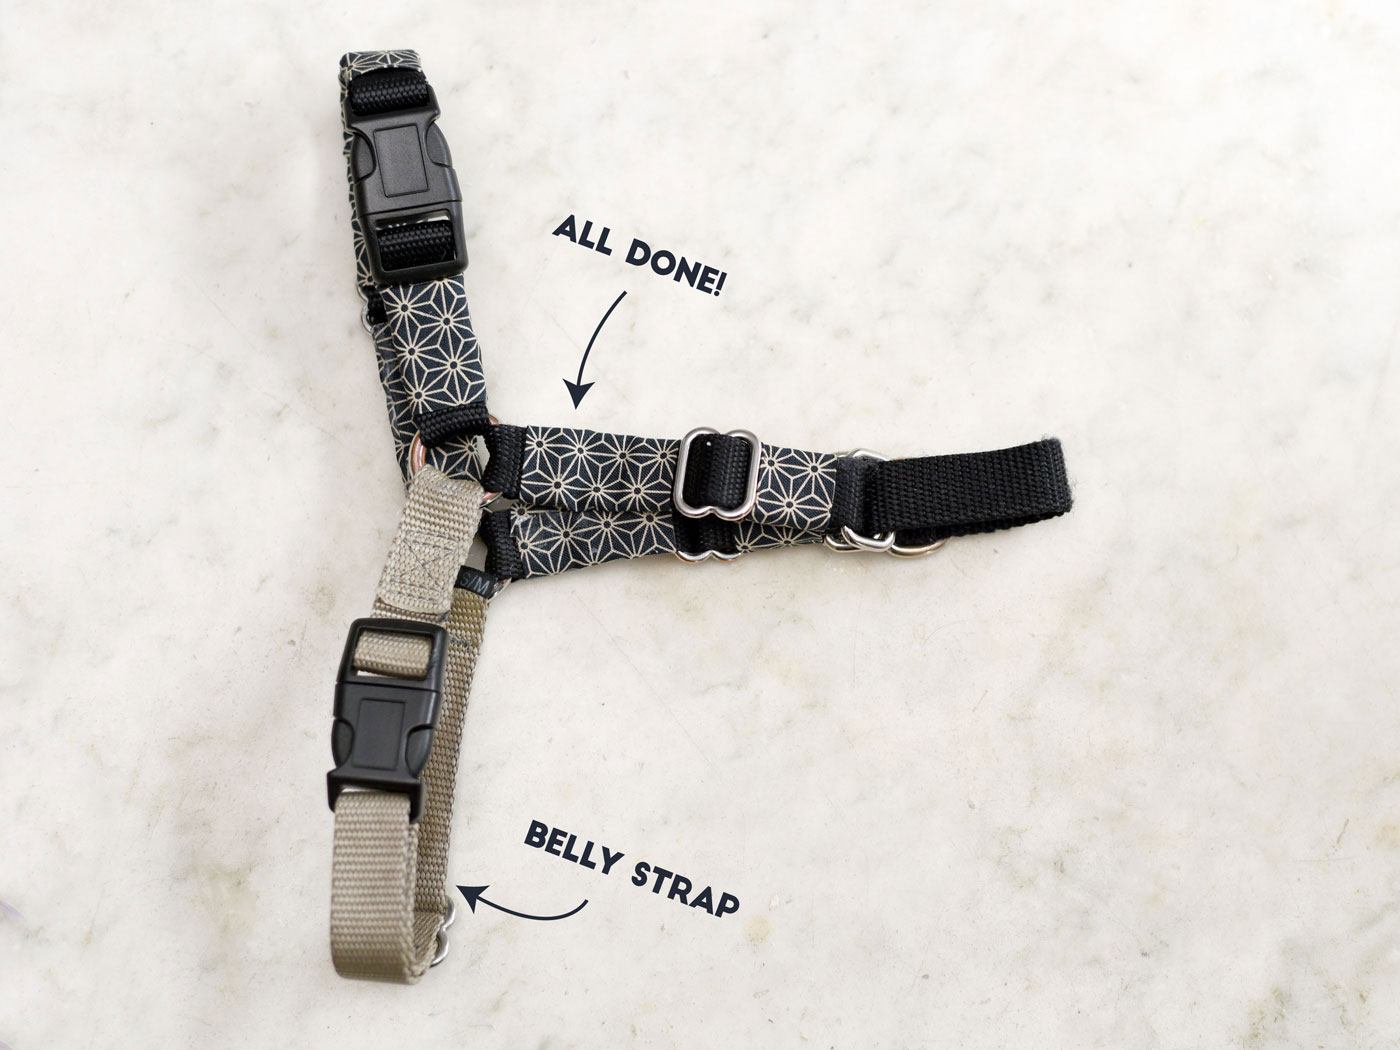
Carefully matching each fabric piece to the correct harness section, fold over as pictured. Depending on your preference, glue or sew the seam. I used glue, but sewing would probably be more durable.
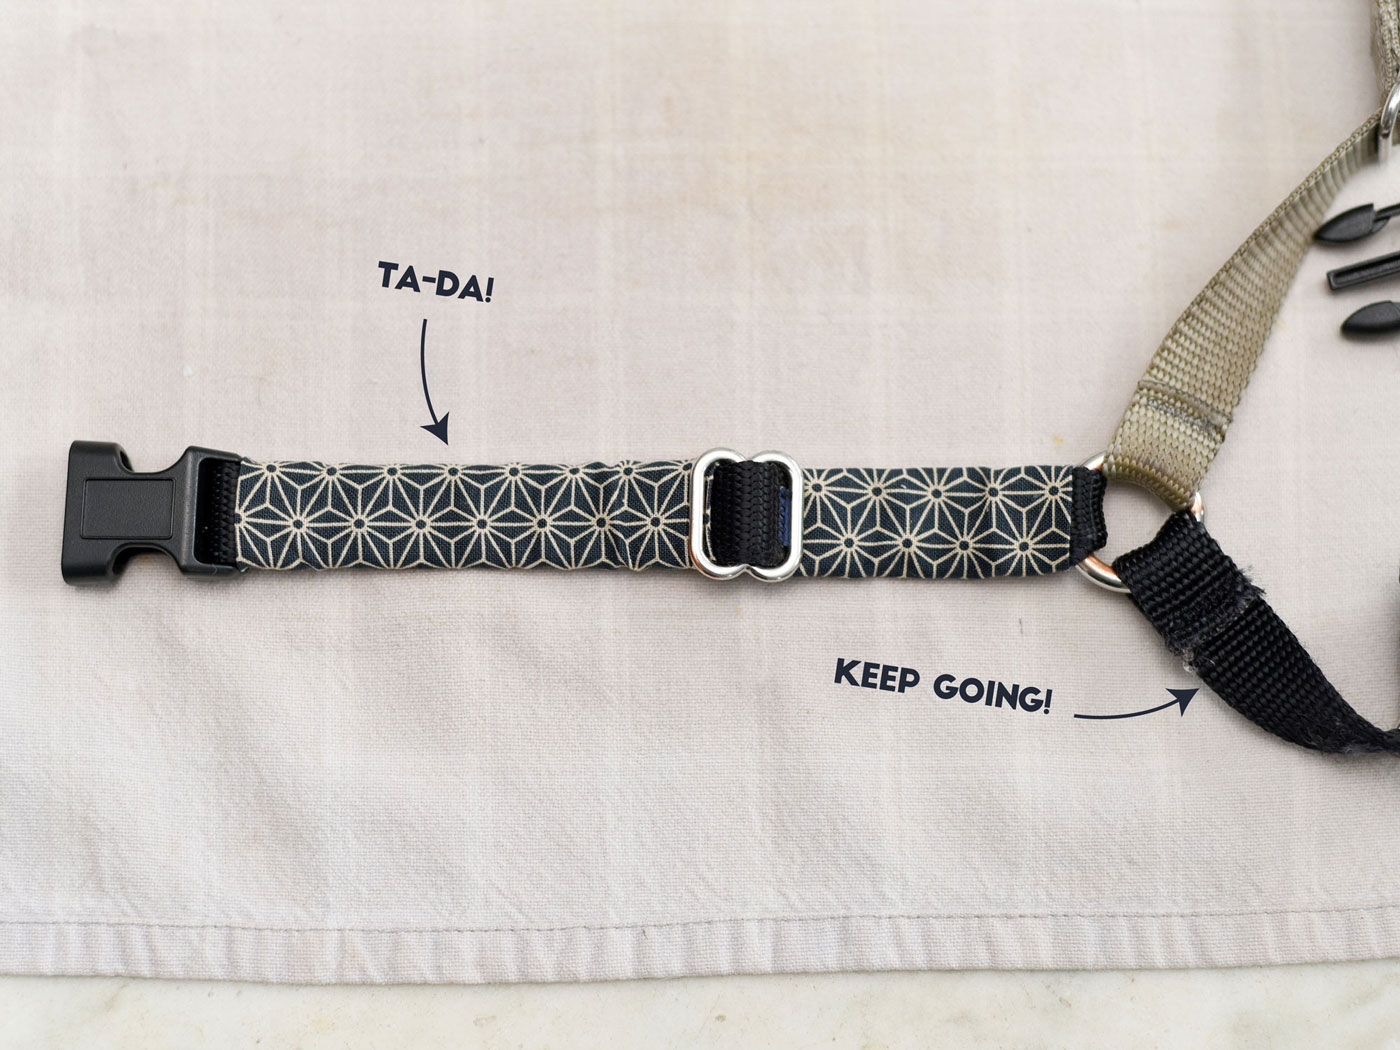
5.) The Big Reveal
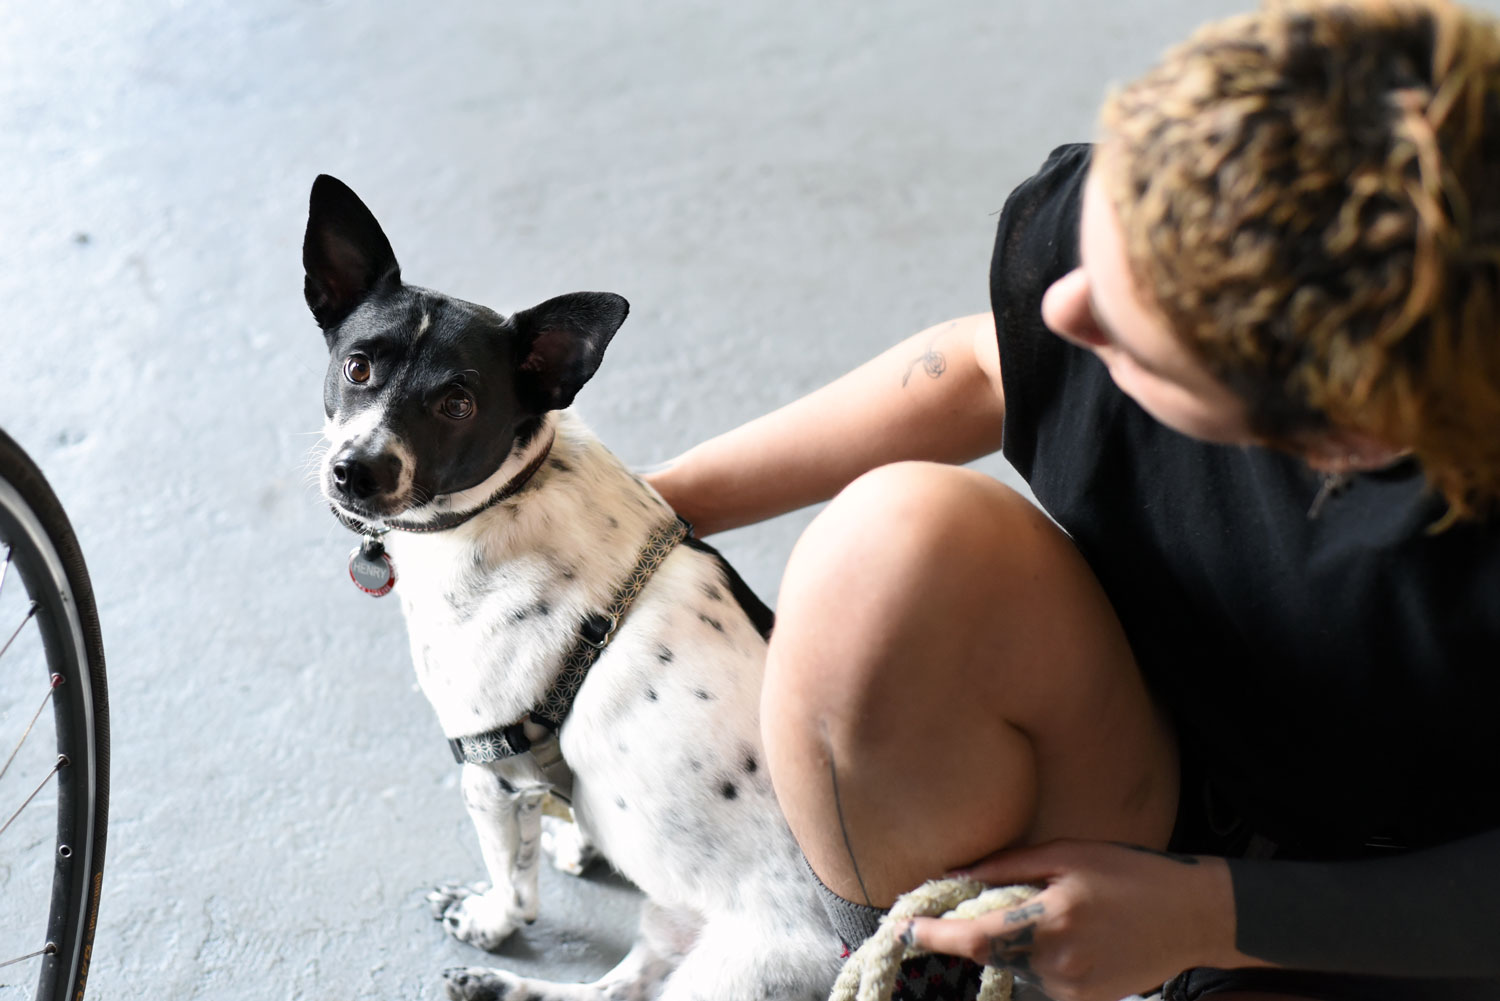
Put that harness on and help your dog look SNAZZY!
 Not too bad, right? You can swap the fabric out for holiday, special events, or to match your own outfit. The possibilities are endless!
Tips
• You may want to choose a fabric that compliments the harness’s original colors, since there will be places where it shows through. Henry’s harness is black with a tan-ish belly strap, so I used a black and tan fabric.
• I chose not to cover the strap that fastens under Henry’s belly; it helps me put the harness on correctly and would probably just get muddy. It’s up to you, though!
• Use the same technique for collars, other harnesses, leashes, belts…get creative! This DIY no sew dog harness upgrade tutorial is great for any strap that could use a little spiffing up!
What KIND OF Fabric Pattern Would You Use?
Let us know in the comments!
Loved this easy DIY? You’ll love these, too!
DIY Friendship Bracelet Collars for You and Your Dog
Printable Conversation Heart Collar Charms


6 Comments
You have the best ideas! I love how you upgraded the fashion but didn’t compromise the function in any way.
Aw, thank you! 🙂
Those traditional no-pull harnesses are so bland. This is a great idea!
Thank you!
Thanks for the clear and detailed instructions. Hope that my product would be as nice as yours… 🙂
You’re welcome! 🙂 I would love to see pictures once you complete it!