
Disclaimer: This post may contain affiliate links.
Want to make an easy and timeless ornament that will celebrate the love you have for your dog? It’s easier than you think! With only a few simple materials — many of which might already be in your house — you can make a fully-custom DIY pet ornament that you’ll cherish for years to come. Keeping reading to learn how I made a Henry ornament for my tree and an Abby ornament for my sister’s!
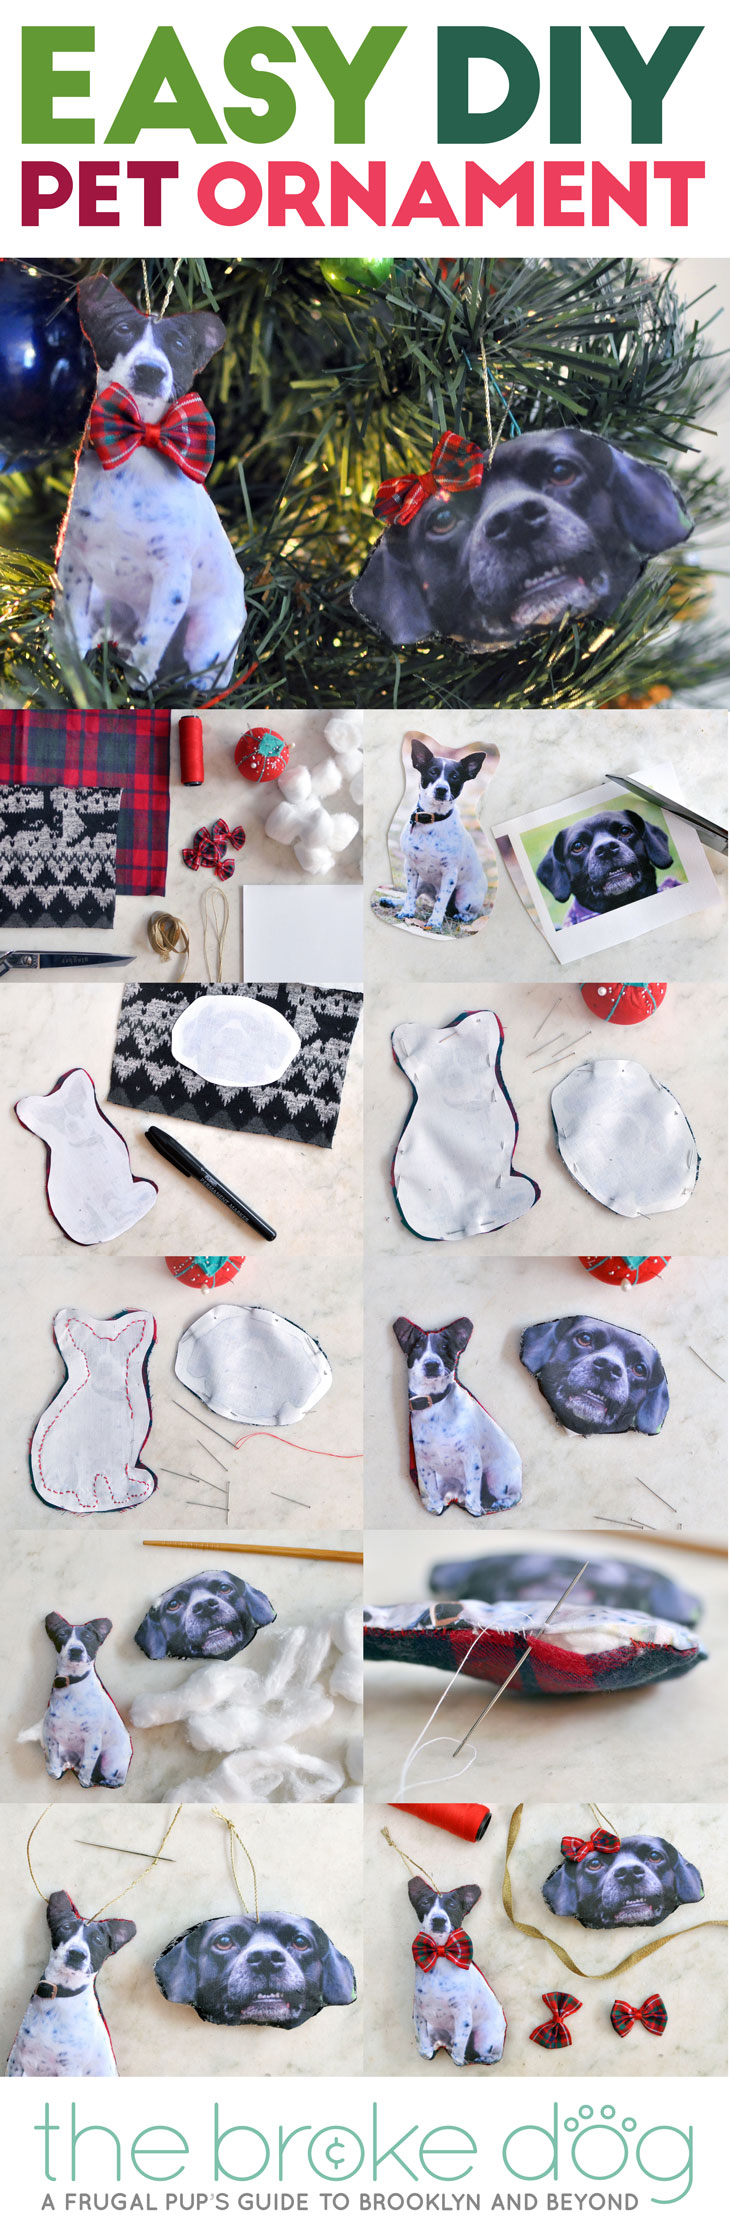
How to Make an Easy DIY Pet Ornament
1.) Gather Your Materials
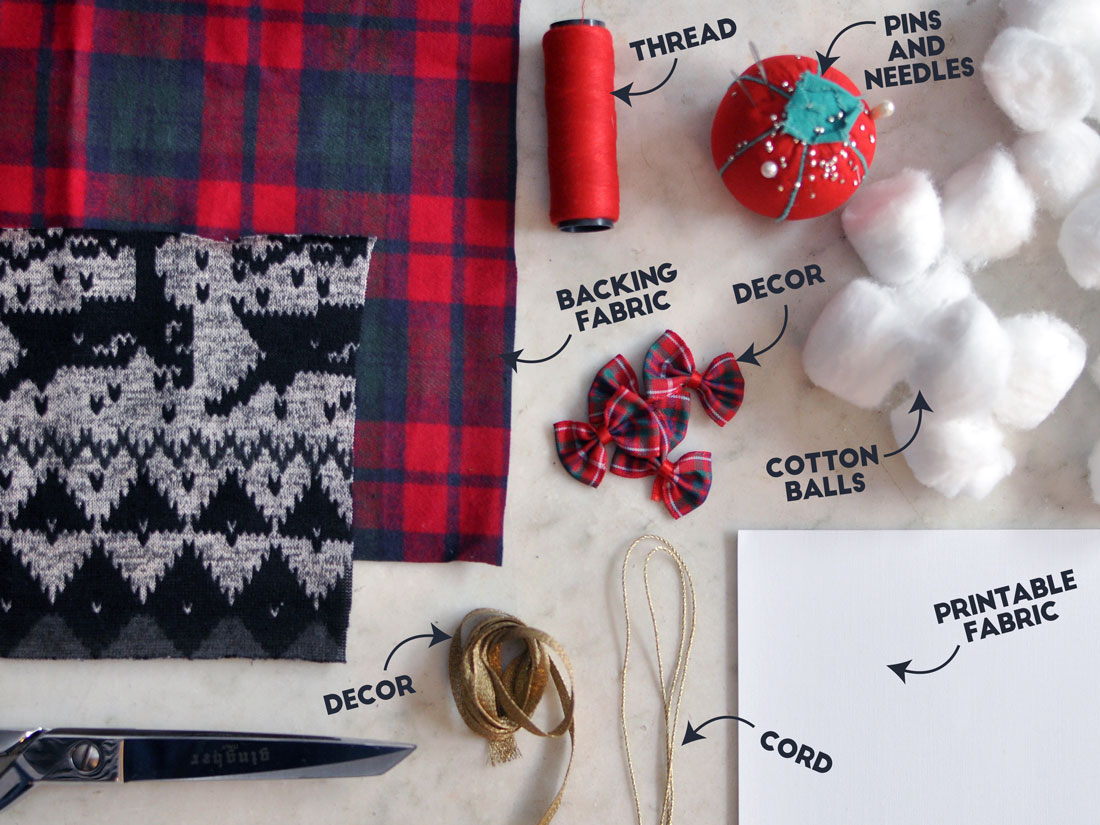
You’ll need:
• A digital photo of your dog
• Printable Fabric (I used June Tailor Colorfast Sew-In Ink Jet Fabric Sheets)
• Fabric for back (I used a plaid cotton flannel and a knit jersey)
• Stuffing (I used cotton balls, but you can also use a polyester fiber filling)
• Needle and thread (including one with a large eye)
• Straight pins
• Cord of choice
• Decorative accents, such as ribbons or bows
Choose a photo that shows your dog clearly and size it so that it is about 4″ tall. If you are making more than one ornament, place multiple images on a single page, making sure there is at least an inch between the edge of each dog.
 3.) Print Your Photo
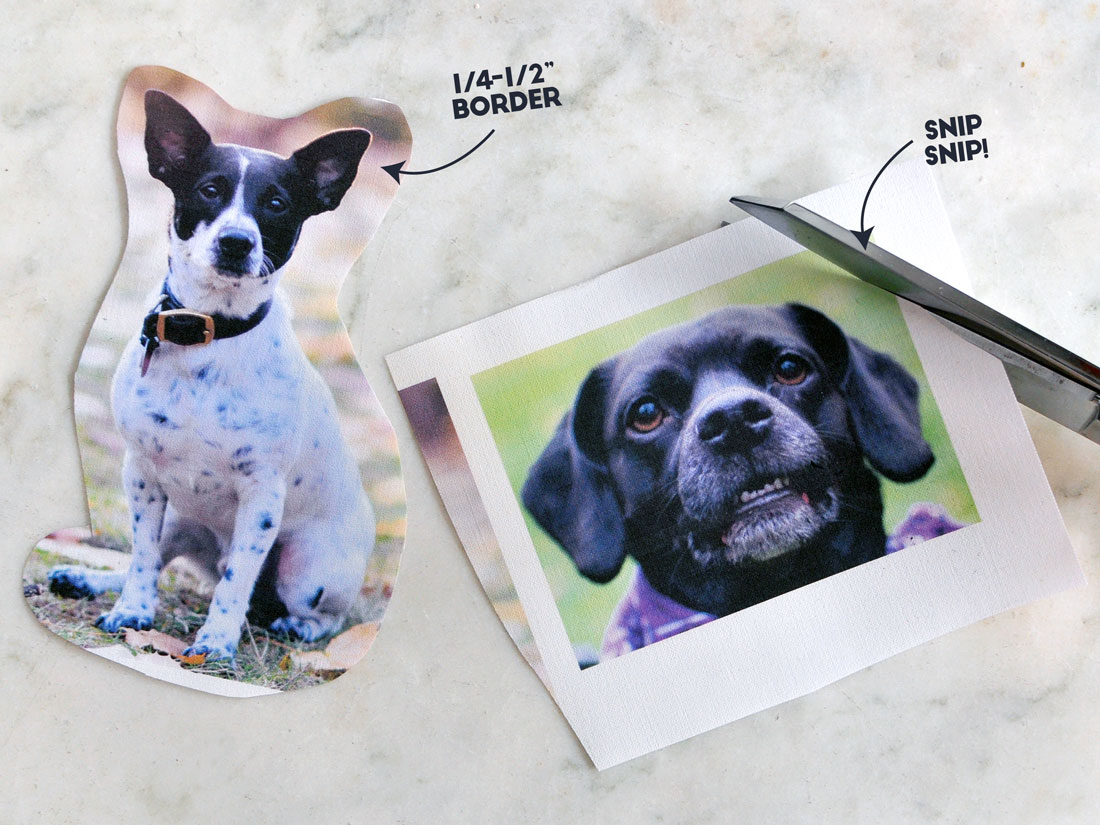
Print at least one tester on regular printer paper first, so you know that the printed images will be the right size. Once you print on your fabric sheet, follow any directions on package to ensure that the ink will set. Once you have successfully printed and set the final image, cut it out leaving a quarter- to half-inch border.
4.) Cut Backing Fabric To Match
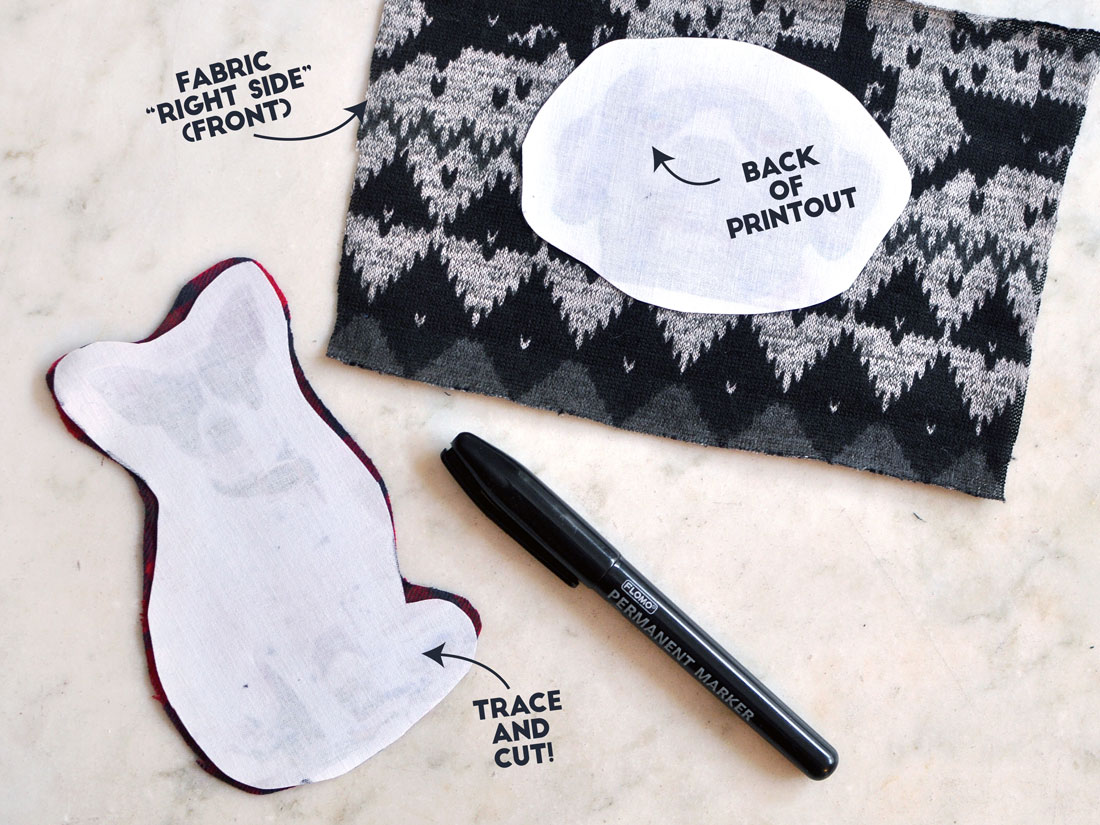
Place the cut piece on your backing fabric, making sure to have the right side of each facing the other. Carefully trace the top piece, then cut your backing fabric out on this line.
4.) Pin It Up
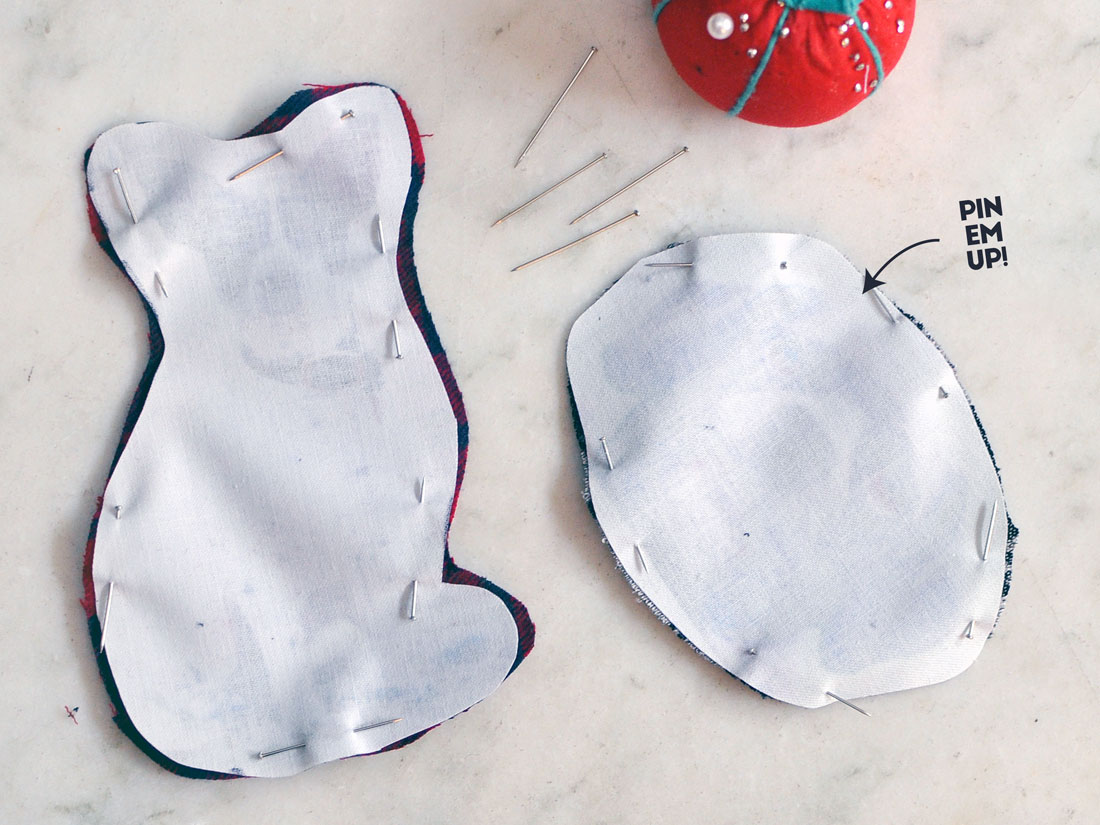
Align the two pieces again so that the good sides face each other. Pin the edges so that they will stay lined up while you sew.

5.) Sew!
Sew the two pieces together. Try to get as close to your dog’s border as possible — you might want to draw an outline to follow. Be sure to leave an opening that is about an inch long.
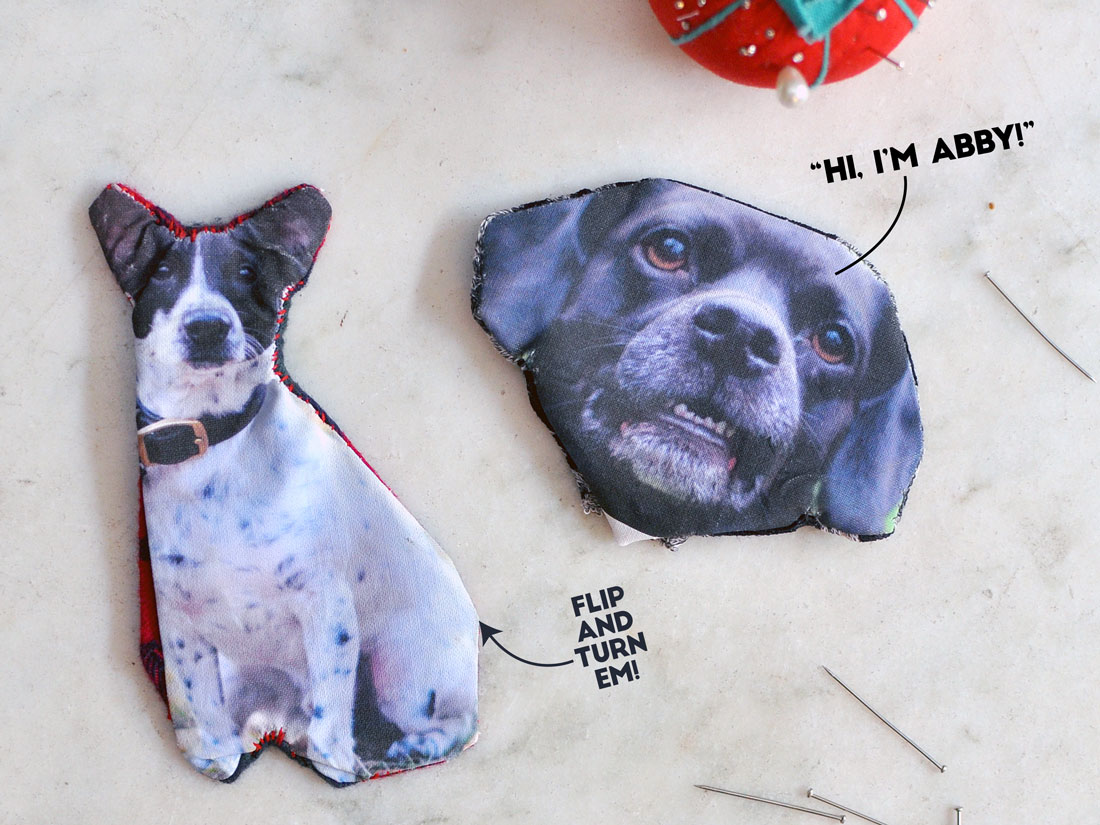
6.) Turn Your Ornament “Right Side Out”
Turn your ornament “right side out.”. Use a chopstick or other dull stick to poke out the appendages.
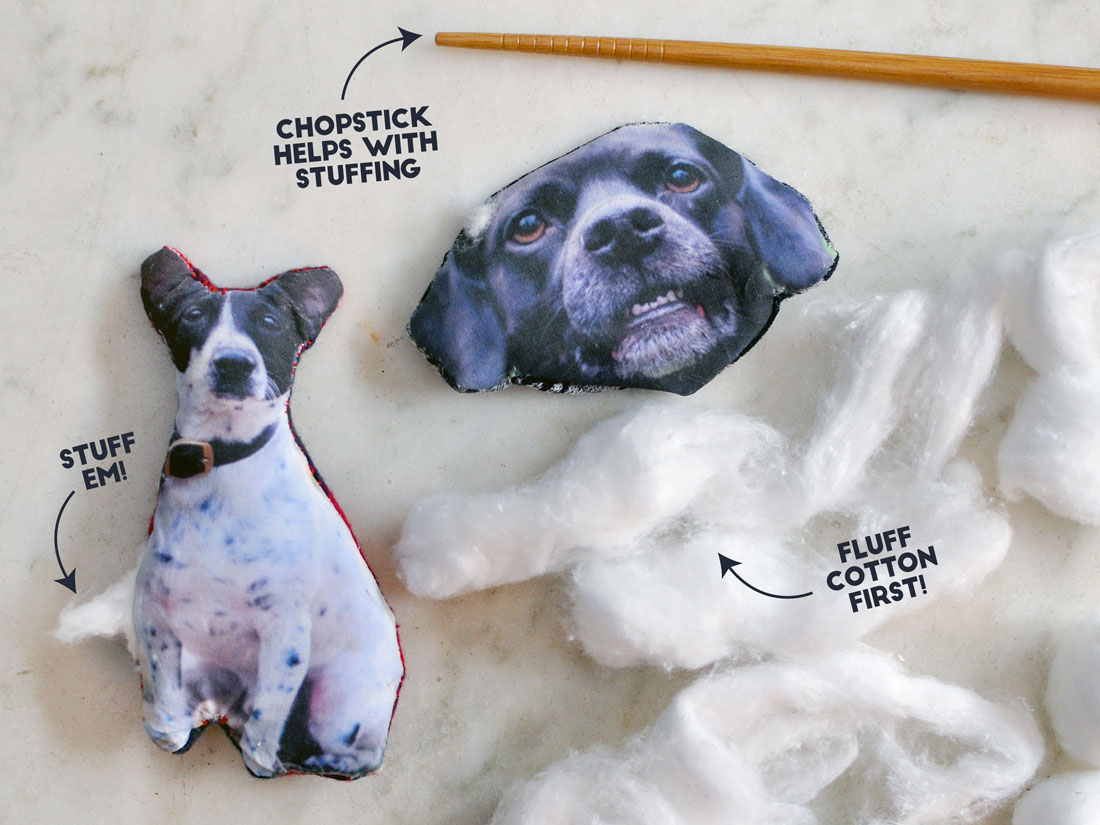
7.) Stuff It!
Using the chopstick as a tool, stuff the cotton or polyester fiber filling into every crevice. If using cotton balls, fluff each one before stuffing it. 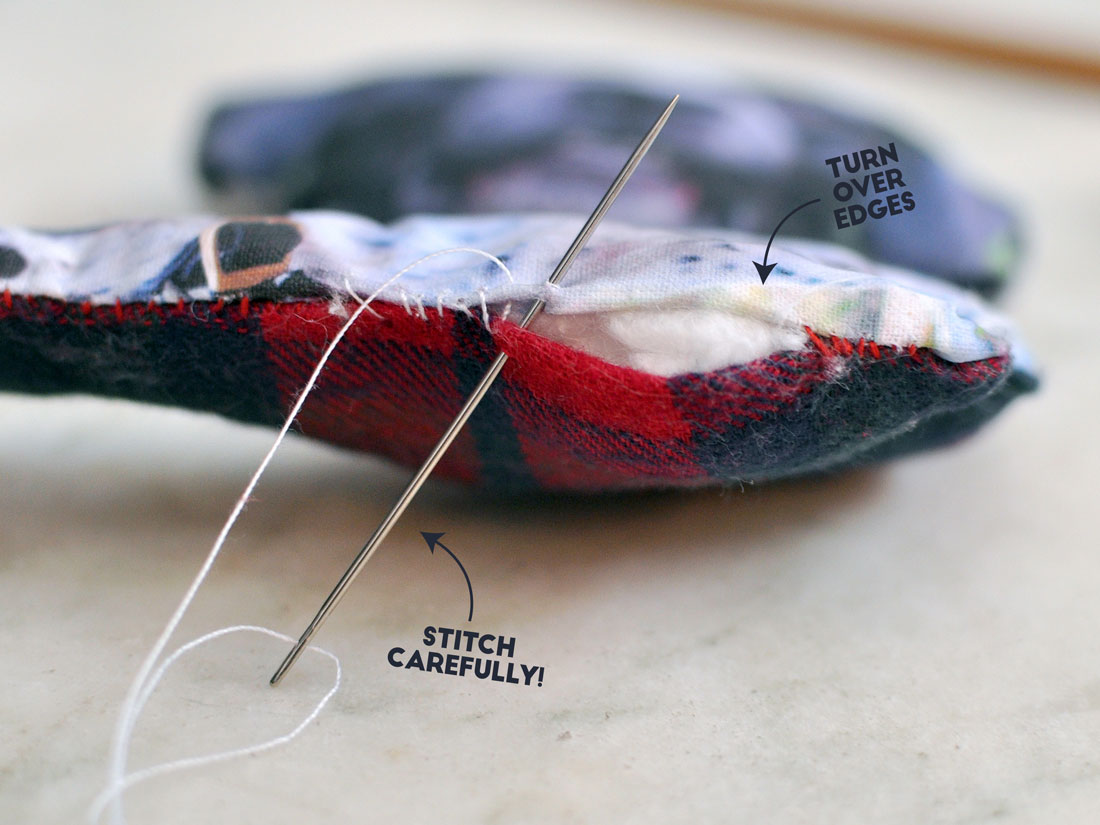
8.) Turn In Edges and Sew
Turn in the fabric edges at the opening and sew it up neatly!

9.) Time For Your Loop!
Thread your cord into a needle with a large eye, then poke it through the stuffed ornament in the appropriate location. Once you have both ends free, tie a knot and trim!
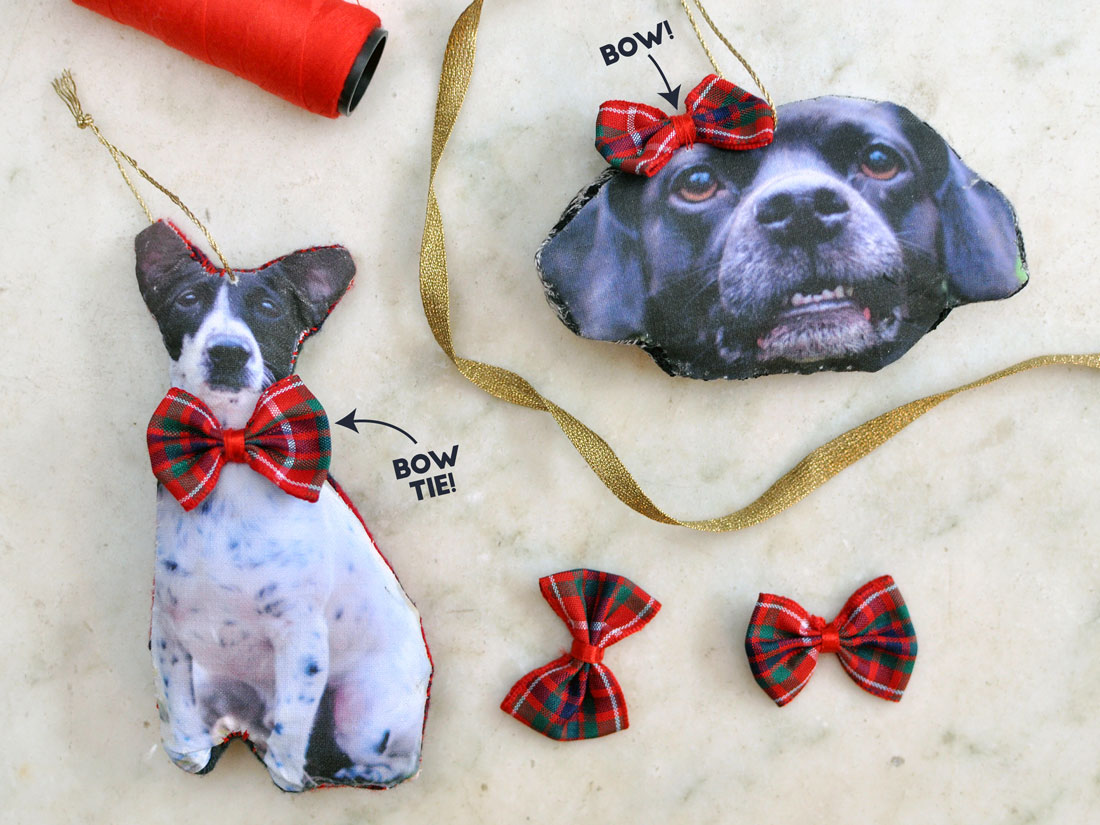
8.) Decorate!
Using a hot glue gun or needle and thread, decorate your ornament using bows, ribbon “collars,” or anything you can think of!
That’s It!
Easy peasy! Keep the following tips in mind while making your ornament:
• Tiny legs and ears are HARD! I had a hard time with Henry’s tiny feet, especially since the printable fabric is pretty stiff. Try to keep your shapes simple — like Abby’s head — to ensure that your final product looks good.
• You can make these ornaments any size and shape you’d like!
• If you don’t know how to sew, a quick Google search will reveal several great tutorials. You can also check out Pinterest and You Tube.
• These ornaments make affordable gifts for all of your dog-loving friends and family members!
Did you try this tutorial? Email us your photos or tag us on Instagram!


25 Comments
These are adorable and for a non-sewer like myself, I actually think I could do this! lol Great tutorial, we will be pinning it! 🙂
Thank you and glad you like it! 🙂
This looks easy enough for ME to do, thanks!
Haha thank YOU! 🙂 Enjoy!
That is such a cute idea! I love making personalized items and gifts. Thanks for this DIY
Isn’t it fun to make personalized gifts? A couple of years ago, I made some dog toys for my sister since she had just adopted Abby…but this year, she gets an Abby head for her tree! 🙂
You had me at EASY lol I am not very crafty but I do believe I can do this! It is so cute! LOVE it and our Lyla will be happy to be on our tree. It is also a great way to honor our pups who have passed. Thank you!
The idea of honoring pups who have passed is such a great idea! I hadn’t even thought of that. I’ll have to make some of the late, great Tuxie and Rory who I still miss all the time.
This is so wonderful! I love homemade and personalized gift ideas (for my own tree, too!) This is really cute. Thank you! Pinning and sharing over on my FiveSibes: Siberian Husky K9 News & Reviews Facebook page!
Thanks so much for sharing! 🙂
This is Inspired!! How great to make a special ornament for your pup or cat? I can see a cat kicking the stuffing out of its mini-me ROFL!!!!!
I have printed on fabric but just ordinary fabic, so if your money is really tight it might be worth the risk (right?)
Thanks so much! And sure, why not! I don’t trust my printer at all so I went the safe route 🙂 One perk to the “special” stuff is that you can treat it so it’s colorfast when wet – but not a big deal for a tree ornament. Haha I am giggling over the mental image of a cat beating itself up! 🙂
These look so adorable and not too tricky to make. Excellent tutorial. I have made cardboard flat Kilo, decorations using photos and t-shirts but never tried printing and sewing like this. What cute gifts and ornaments.
Oh how I love this!! SO darling!! easy too … love it!
These are adorable! I think I’ll try to make some for gifts, but it might take me to next year to get around to it.
OK, so I am laughing that this is your post today …considering my post today. I really want to try this, but I am pretty sure I would fail – in an epic way! What I failed to mention in my post this morning, is that I almost flunked Home Economics (specifically sewing) when I was in middle school.
But these are so adorable and it definitely makes me want to not give up on the DIY thing!
Hahaha it’s funny timing! 🙂 From the beginning, I meant to do more DIY posts and just haven’t had the chance so I really want to do more. I doubt you would fail!
Love this idea, its brilliant, thanks for sharing 🙂
Great idea! It was difficult for me to keep all of Truffle and Brulee’s ear tufts when I made their flats for BlogPaws.
Great DIY project! I think I could do it and I’m not crafty at all.
This is such a cool idea. It has been years since i picked up a sewing needle but i am definitely going to do this thank you for the easy DIY
Wow i love your idea. I like DIY things and i make a lot of handmade things for my family&friends but i haver tried making ornaments before. Thank to for you post, now can i can decorate my Chrismas trees, with my own dog’s pictures!
THANK YOU, I WILL LOVE TRYING TO DO THIS
Thank you for checking it out! Enjoy!
Pingback: Budget-Friendly Holiday Activities To Do With Your Dog - Dog Mom Days